How to Trace a Logo in LightBurn
LightBurn's built-in Trace Image tool converts raster logos to vector paths directly in your laser software. This guide covers every setting, explains what works and what fails and shows how Laserlinez handles complex logos that the built-in trace cannot.
What This Guide Covers
LightBurn includes a Trace Image function that converts raster images — JPG, PNG, BMP — into vector paths without leaving the laser software. For clean, high-contrast logos it produces usable results quickly. For logos with gradients, fine detail, or JPEG compression, it reaches its limits fast.
This guide walks through the exact steps, explains every parameter in the trace dialog, shows which logos trace well and which fail and explains when Laserlinez gives you the multi-layer SVG output that LightBurn's trace cannot produce.
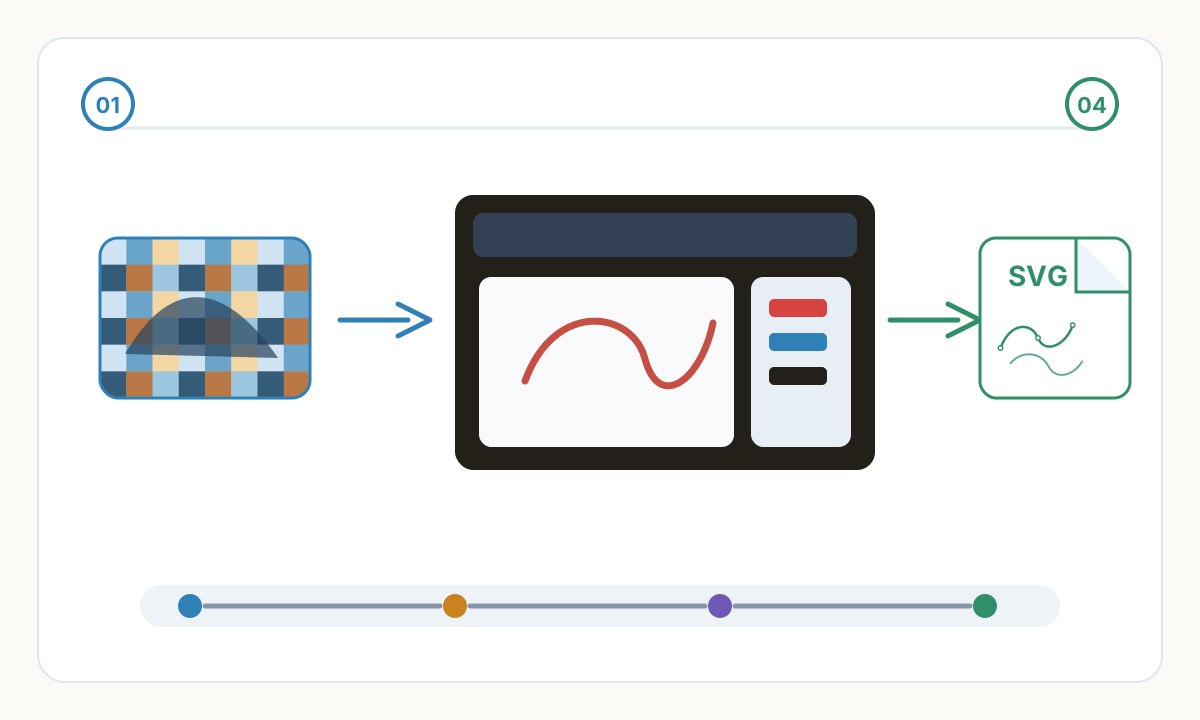
How to Trace a Logo in LightBurn: Step by Step
- 1
Import your logo file
Go to File > Import (Ctrl+I on Windows, Cmd+I on Mac) and select your logo. LightBurn supports PNG, JPG, BMP, GIF and TIFF. Always use PNG over JPG — JPEG compression creates block artifacts at every edge that trace as hundreds of unwanted small regions. Drag the image to position it in your workspace after import.
- 2
Select the image
Click the image to select it. A bounding box with handles appears around it. The Trace Image option in the Tools menu is only available when an image is selected — if the menu item is grayed out, the image is not selected.
- 3
Open Trace Image
Go to Tools > Trace Image. The dialog opens with a live preview that updates in real time as you adjust sliders. The preview shows the vector outline that will be generated overlaid on your image — what you see in the preview is exactly what gets placed on the canvas.
- 4
Set the Threshold
The Threshold slider (0–255) is the most critical setting. It converts your image to pure black and white before tracing: pixels below the threshold become black (engraved), pixels above become white (not engraved). For a black logo on white, start at 128 and adjust until the preview shows clean logo shapes with no stray background regions included.
- 5
Adjust Smooth Corners and Optimize
Smooth Corners (0–1) controls how aggressively pixel-stepped edges are softened into curves — 0.2 to 0.4 works well for most logos. Optimize removes anchor points that fall within a set distance of the straight line between their neighbors, reducing total node count. Higher Optimize values produce fewer nodes, smoother laser toolpaths and faster engraving speeds.
- 6
Apply and remove the raster image
Click OK. LightBurn places the traced vector on top of the original raster image. Click on the raster image to select it (click slightly outside the vector boundary, or use Edit > Select All then deselect the vector) and press Delete. The traced vector remains. Assign it to your target cut layer and set laser parameters.
Use PNG, not JPEG. JPEG compression creates color-blended pixels at every edge — each cluster traces as a separate closed region, surrounding your logo with hundreds of tiny unwanted shapes. Use a plain white background with no shadows or feathered edges. Minimum 300 DPI at the intended engraving size; 600 DPI for logos with thin strokes or fine text. Remove any drop shadows, glows, or soft transparency before importing.
Understanding the Trace Settings
Threshold (0–255): Every pixel is classified as black or white based on this cutoff. Pixels below the value become engraved areas; pixels above become empty space. For logos on colored backgrounds, you may need to pre-process the image in an editor to isolate the logo on a solid white background before threshold can cleanly separate foreground from background.
Ignore less than (mm²): Removes closed regions smaller than this area after tracing. Increasing this eliminates noise spots and compression artifacts without affecting the main logo shapes. Start at 0.5 mm² and increase until stray specks disappear without removing intentional small design elements.
Smooth Corners: Applied after tracing to convert pixel-stepped edges into smooth Bézier curves. A value of 0 preserves every original corner; 1.0 applies maximum smoothing. For logos, 0.2–0.5 smooths anti-aliasing artifacts while preserving intentional sharp corners in the design.
Optimize: Removes redundant anchor points that lie within a set tolerance of the line between their neighbours. This directly reduces node count. Fewer nodes mean simpler toolpaths, more consistent laser speed and cleaner burn quality — particularly important on curves and corners where over-complex paths cause micro-hesitations visible in the finished engrave.
When LightBurn's Trace Works Well
The built-in trace tool excels at a specific set of inputs. Match these characteristics and you will get clean, usable results in under a minute:
- Simple logos with 1–2 solid colors and no gradients — a single threshold value cleanly separates foreground from background
- Black and white artwork: wordmarks, monograms, silhouettes and simple icons with solid filled shapes
- PNG exports from vector software (Illustrator, Inkscape, CorelDRAW) with no anti-aliasing or transparency
- Technical diagrams and line-graphic SVG with solid black strokes on a clean white background
- Images specifically pre-processed to pure black and white before importing
When LightBurn's Trace Fails
Understanding these failure modes will save you hours of troubleshooting. If your input matches any of these, expect poor results:
- Photographs and photorealistic images — tonal gradients produce thousands of fragmented regions with no meaningful boundaries
- JPEG images — compression block artifacts trace as a grid of tiny rectangular noise regions around every edge
- Logos with gradients, soft shadows, or glows — edges are ambiguous; no threshold value cleanly separates them
- Low-contrast inputs — light gray logo on white, or dark blue on black — threshold cannot reliably find the boundary
- Complex logos with fine detail, thin strokes, or small text — fine elements collapse or become blobs depending on threshold
- Multi-color logos requiring separate engraving passes — LightBurn trace outputs binary (black/white) only, no layered output
- Website or PDF screenshots — typically JPEG-compressed, low-resolution and anti-aliased at the edges
JPEG compression groups pixels into 8×8 blocks and approximates color values within each block. At logo edges, this creates a visible ring of mixed-color pixels. LightBurn's threshold traces each cluster as a separate closed region, producing a dense halo of tiny shapes around every edge. The fix: open the JPEG in any image editor, add a clean white background and export as PNG. Re-import the PNG and retrace — the artifact regions disappear immediately.
When You Need More: Laserlinez for Complex Logo Engraving
LightBurn's trace is a binary tool — black or white, engraved or not. Real logos rarely work that way. Laserlinez was purpose-built for laser engraving file preparation and handles the cases that the built-in trace cannot.
Laserlinez analyzes the full tonal range of your image using AI-powered line detection algorithms. Instead of a single threshold decision, it maps different tonal ranges to separate vector layers — each layer corresponds to a different engraving pass at a different power level. The output is a multi-layer SVG where each group represents a distinct engraving depth.
When imported into LightBurn, each SVG layer group appears as a separate entry in the Cuts/Layers panel. You assign different speed and power settings per layer to create depth variation in your engrave — delivering results that a single binary trace simply cannot achieve. Path optimization is applied automatically, producing minimal-node Bézier curves that translate directly to consistent laser speed and clean burn edges.
How to Import a Laserlinez SVG into LightBurn
- 1
Upload your logo to Laserlinez
Open the Laserlinez workspace and upload your logo file. PNG is ideal. Select the laser engraving preset — the Tonal Line Vectorization preset works well for logos with clear linework; multi-layer presets suit logos with tonal variation or fine detail. Processing typically completes in under 2 minutes for logos.
- 2
Download the SVG file
After processing, download the SVG output. The file contains multiple path groups organized by tonal range, each representing a different engraving depth. All paths are already optimized — minimal nodes, clean Bézier curves, no duplicate geometry.
- 3
Import into LightBurn
In LightBurn, go to File > Import (Ctrl+I) and select the downloaded SVG. LightBurn reads each SVG group as a separate element. In the Cuts/Layers panel on the right, each layer appears with its own color indicator ready for individual parameter assignment.
- 4
Assign laser settings per layer
Click each layer in the Cuts/Layers panel and set speed and power for the engraving depth it represents. Darker/heavier areas typically need higher power or slower speed. Lighter detail layers use reduced power for subtle surface marks. Run a test burn on scrap material of the same type and thickness before engraving your final workpiece.
- 5
Preview and engrave
Press Alt+P in LightBurn to open the Preview and verify burn order and layer sequence. Run a framing pass (laser at 0% power) to confirm alignment on your material. When satisfied, proceed with engraving.
Pre-Engraving Quality Checklist
- All paths are closed — no gaps that cause the laser to start and stop unexpectedly mid-shape
- No overlapping or duplicate paths — duplicate geometry causes double-burning and uneven depth
- Minimum feature size is larger than your laser beam diameter — elements smaller than kerf width cannot be cleanly engraved
- All layers are assigned to correct cut settings — no layer left on default settings from a previous job
- Raster image deleted — only vector paths remain in the workspace
- Preview checked at full scale — verify burn order and layer sequence before firing the laser
- Test engrave completed on scrap material of the same type and thickness as your workpiece
Comments
Loading comments...